Also, I have had my printer up and running for about a week now. I had no problems with anything sticking to the bed. All of a sudden, without changing anything, nothing will stick to the bed. I'm using the borosilicate glass on top of the Onyx heater and spraying with hairspray. I wasn't cleaning between prints and had no problems. Now, even after cleaning it, nothing sticks.
Rostock Max Print Issues
Rostock Max Print Issues
Can anyone explain why my infill is not connecting to the perimeter. I intentionally positioned two parts in different orientations to see if that had any effect and the issue was just as bad in both parts. I killed the job after only a few layers.
Also, I have had my printer up and running for about a week now. I had no problems with anything sticking to the bed. All of a sudden, without changing anything, nothing will stick to the bed. I'm using the borosilicate glass on top of the Onyx heater and spraying with hairspray. I wasn't cleaning between prints and had no problems. Now, even after cleaning it, nothing sticks.
Also, I have had my printer up and running for about a week now. I had no problems with anything sticking to the bed. All of a sudden, without changing anything, nothing will stick to the bed. I'm using the borosilicate glass on top of the Onyx heater and spraying with hairspray. I wasn't cleaning between prints and had no problems. Now, even after cleaning it, nothing sticks.
Re: Rostock Max Print Issues
classic "Delta Arm Blues" problem.
Please read that and you'll get over those blues.
As for sticking (or lack thereof) - that really sounds like a Z=0 issue. I bet you are not close enough. Try increasing the X, Y and Z max lengths by .1 mm and test, then .2 mm and test until you either get sticking or are too close. You could also be too close in now that I think about it. So try decreasing these by .1mm if you suspect that. Printers break in and other changes (humidity, temp) might have affected your Z-0.
Sublime Layers - my blog on Musings and Experiments in 3D Printing Technology and Art
Start Here:
A Strategy for Successful (and Great) Prints
Strategies for Resolving Print Artifacts
The Eclectic Angler
Re: Rostock Max Print Issues
Awesome. Thanks for sharing. I'm going to take a close look at mine and see if I can make any improvements.
Re: Rostock Max Print Issues
Those delta arms need to move freely but without slop - and no "catches".
Sublime Layers - my blog on Musings and Experiments in 3D Printing Technology and Art
Start Here:
A Strategy for Successful (and Great) Prints
Strategies for Resolving Print Artifacts
The Eclectic Angler
-
MorbidSlowBurn

- Printmaster!
- Posts: 169
- Joined: Sun Mar 03, 2013 5:33 pm
Re: Rostock Max Print Issues
I know mhackney has much more expertise in 3d printing than I, but it looks like filament starving is also occurring.
1. Make sure your slicer is set-up for the measured filament diameter. Take measurements in a couple of places and use the average in you slicer program.
2. Ensure your extruder is gripping the filament properly. You should be able to give a feed command and put a little resistance on the filament entering the extruder without it slipping. Also make sure the filament hasn't been distorted after the extruder. You don't want so much pressure that the filament is crushed.
3. Make sure your steps are set right for your extruder. When you send a feed command, e.g. 50mm, the extruder should take that amount of filament. The distance on the filament should be measure prior to the feed rollers. If it is really off take your input distance divided by measured distance and multiply that by your steps/mm. Take that calculated value and place it back into your EEPROM or config file. Repeat to ensure the step/mm are correct for your set-up.
Re: Rostock Max Print Issues
Good eye and I agree. I am a big believer in changing/controlling 1 thing at a time and testing the result. Pick one or the other but don't do everything at once! But I agree that extruder calibration will be required too.
Sublime Layers - my blog on Musings and Experiments in 3D Printing Technology and Art
Start Here:
A Strategy for Successful (and Great) Prints
Strategies for Resolving Print Artifacts
The Eclectic Angler
Re: Rostock Max Print Issues
So which is the most likely culprit? I'm tempted to work on the extruder first because I dread diassembling the hot end and removing the arms and platform.
Re: Rostock Max Print Issues
I have no doubt that your delta arms are too tight. But go ahead and work on the extruder, but you won't be looking to get connection of the infill to the perimeter, you will be looking to correct the missing infill like the part on the right in your photo.
Sublime Layers - my blog on Musings and Experiments in 3D Printing Technology and Art
Start Here:
A Strategy for Successful (and Great) Prints
Strategies for Resolving Print Artifacts
The Eclectic Angler
-
MorbidSlowBurn
- Printmaster!
- Posts: 169
- Joined: Sun Mar 03, 2013 5:33 pm
Re: Rostock Max Print Issues
As mhackney said, attack one issue at a time. The tight joints will cause small holes in the part. What really made me think about feed is that you can distinguish each perimeter, there should be no gap between them. Even with tight joints the perimeters should be blending together and the infill should be similar. Only time you should see large/continuous spaces are with a non-solid infill.
So my vote is extruder first for filament feed. Then joints if small gaps still persist.
So my vote is extruder first for filament feed. Then joints if small gaps still persist.

Re: Rostock Max Print Issues
Doesn't look like a filament feed issue - I had that issue with my extruder running at half the steps per mm.
I'm currently experiencing similar (though not as bad) issues with my prints, I'm fairly certain it's my delta arms
But in answer to your question about the first layer sticking issue - definitely check your distance from the bed. Grab a piece of paper, put it on the print surface and send the command G1 Z0 F2000 - check ('feel') the distance from the hotend to the paper - you should be able to slide the paper around, but 'feel' the hot end gripping the paper. If thers is no grip - your nozzle is too far away from the bed, if you can't move the paper, you're too close!
(Note you should do this with the hotbed at 75 to 100c for best results)
Also note plastic can't stick to the oils from your fingerprints very well. Sometimes (if you've handled the print surface a lot recently) it's a smart idea to wipe the print surface with some acetone to clean off those oils. I don't have to do it often, but I have seen it make a major difference in first layer adhesion on my Makerbot Replicator after cleaning with acetone. (Sometimes the parts stick too well!)
(No trees were killed to post this message, but a large number of electrons were terribly inconvenienced.)
Re: Rostock Max Print Issues
I'm inclined to agree cassetti, I went back and looked at the photos of the Z Calibration Thing prints in my post (linked above) and I agree, even some of the other artifacts like un-bonded perimeters and internal fill issues were resolved by getting rid of the delta arm blues.
Sublime Layers - my blog on Musings and Experiments in 3D Printing Technology and Art
Start Here:
A Strategy for Successful (and Great) Prints
Strategies for Resolving Print Artifacts
The Eclectic Angler
Re: Rostock Max Print Issues
Mhackneymhackney wrote:classic "Delta Arm Blues" problem.
Please read that and you'll get over those blues.
As for sticking (or lack thereof) - that really sounds like a Z=0 issue. I bet you are not close enough. Try increasing the X, Y and Z max lengths by .1 mm and test, then .2 mm and test until you either get sticking or are too close. You could also be too close in now that I think about it. So try decreasing these by .1mm if you suspect that. Printers break in and other changes (humidity, temp) might have affected your Z-0.
I read your post - did you print all 3 at the same time? Is there a way to really track down the issue - doesn't sound like it - sounds like I need to remove every arm and check each. Do I need to worry about the cheapskate side of the arms, or should I focus my attention on the hotend carriage side of the arms?
(No trees were killed to post this message, but a large number of electrons were terribly inconvenienced.)
-
MorbidSlowBurn
- Printmaster!
- Posts: 169
- Joined: Sun Mar 03, 2013 5:33 pm
Re: Rostock Max Print Issues
Although I do agree that the delta arms will need adjustment. In mhackney's prints the affected areas were very localized. In Harley's original image the issues are throughout the part and fairly uniform. Gaps appear between all lines printed. If it was only friction in the arms there would be areas where the material would be completely touching and others with no touch.
My number 3 area of attack addresses step/mm issues which if are half of what they should be is definitely a filament starving issue.
Besides it is easier to confirm filament feed prior to sanding any arms for friction.
Now I am really curious what the root cause is. Probably a combination of things.
Re: Rostock Max Print Issues
I printed each one individually. This was primarily so I could align the fill direction with the axis being tested. Each one is different. I suppose the 3 gcode files could be merged into 1 so they all print together!
I invested considerable time to determine the problem and then predict which tower was faulty. In my case I was correct and accurately determined where the tight joints were based on the prints. I can't tell from your prints because I do not know how they were aligned on the print bed or how the fill is configured. However, having looked at quite a few of these types of prints, I am 85% (hedging my bets here, I am actually 100%) confident that you have a tight joint or a few of them. When you have the arms apart ready to work on them you will know immediately where the tight ones are. You need to check both ends unfortunately.
I invested considerable time to determine the problem and then predict which tower was faulty. In my case I was correct and accurately determined where the tight joints were based on the prints. I can't tell from your prints because I do not know how they were aligned on the print bed or how the fill is configured. However, having looked at quite a few of these types of prints, I am 85% (hedging my bets here, I am actually 100%) confident that you have a tight joint or a few of them. When you have the arms apart ready to work on them you will know immediately where the tight ones are. You need to check both ends unfortunately.
Sublime Layers - my blog on Musings and Experiments in 3D Printing Technology and Art
Start Here:
A Strategy for Successful (and Great) Prints
Strategies for Resolving Print Artifacts
The Eclectic Angler
Re: Rostock Max Print Issues
@MorbidSlowBurn - if you look at the item on the left of the posted photo it has tight lines at the lower left and gaps up and to the right. We don't know if these parts were printed at once or individually and if the later with the same gcode. There is no doubt that filament starving can create similar results but the part on the left leads me to believe tight joints are also a consideration.
@cassetti - when you assembled your printer, how much time and attention did you give the joints? Did you work to insure smooth operation with minimal tightness? In my case, I knew they were a little stiff when I installed them, believing they would loosen up. They didn't!
By the way, funky looking part, what is it?
Sublime Layers - my blog on Musings and Experiments in 3D Printing Technology and Art
Start Here:
A Strategy for Successful (and Great) Prints
Strategies for Resolving Print Artifacts
The Eclectic Angler
-
MorbidSlowBurn
- Printmaster!
- Posts: 169
- Joined: Sun Mar 03, 2013 5:33 pm
Re: Rostock Max Print Issues
@mhackney- I agree there are most likely issues with the joints. But I'd recommend spend 30 minutes confirming filament feeds prior to a couple hours sanding (based on severity of gaps most likely a lot of friction therefore a lot of sanding.) I like to tackle and confirm simple/easier fixes first, then go after the tough/time consuming fixes. Besides you had covered the joints, so I was adding to what a possible cause could be.
Re: Rostock Max Print Issues
I am using the borosilicate glass and spraying it with hairspray. I don't think I've ever touched it between prints, aside from holding the edge so I can scrape the part off. Every so often, I will lightly scrape the surface with a side razor blade designed for scraping decals. I was only doing that to make sure the surface stays relatively flat as the hairspray builds up. Until I started having the issue with sticking, I wasn't cleaning it at all. Are other people doing this?
Re: Rostock Max Print Issues
I spray and go and after 10-20 prints, do a little local scraping (I tend to print in the middle) like you do with a single edge razor blade and respray that area only. A little build up probably helps the 1st layer stick!
Sublime Layers - my blog on Musings and Experiments in 3D Printing Technology and Art
Start Here:
A Strategy for Successful (and Great) Prints
Strategies for Resolving Print Artifacts
The Eclectic Angler
Re: Rostock Max Print Issues
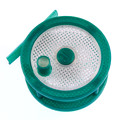
These are the first several layers of a pair of pieces designed to clamp around an overhead rail in my F150. I abandoned the print after only a few layers because it looked so bad. Both parts were printed at the same time, in different orientations. One was 90° to the other.
I have played with the extruder and not been able to get any kind of improvement. If I tighten the screws down, it starts leaving "dotted" lines instead of smooth ones. If I'm having an issue of starving it for filament, I can't see any reason to loosen the screws any more. They aren't super tight anyway. The wheels are leaving a diamond shape in the filament but I can't tell it is distorting any. When I manually feed filament, it seems to pump out just fine. What else can I check on the extruder?
I have played with the extruder and not been able to get any kind of improvement. If I tighten the screws down, it starts leaving "dotted" lines instead of smooth ones. If I'm having an issue of starving it for filament, I can't see any reason to loosen the screws any more. They aren't super tight anyway. The wheels are leaving a diamond shape in the filament but I can't tell it is distorting any. When I manually feed filament, it seems to pump out just fine. What else can I check on the extruder?
Re: Rostock Max Print Issues
If the knurled rollers are leaving diamond patterns in the filament, they are too tight. It is a fine balancing act to get this setup properly. I wager that your extruder acceleration and/or feed rates are too high in the firmware (/EEPRIM if using Repetier). Back down the acceleration to about 1200mm/s and speed to 100mm/s and loosen up the clamp screws a bit. Then try it.
Sublime Layers - my blog on Musings and Experiments in 3D Printing Technology and Art
Start Here:
A Strategy for Successful (and Great) Prints
Strategies for Resolving Print Artifacts
The Eclectic Angler
-
MorbidSlowBurn
- Printmaster!
- Posts: 169
- Joined: Sun Mar 03, 2013 5:33 pm
Re: Rostock Max Print Issues
Mhackney beat me to it again. I was going to ask what speed and feed rates you are using. And your extruder shouldn't be distorting your filament. You want just enough pressure for consistent feed without slipping.
Did you do polygonhell's extruder calibration? Your looking to make sure your feeding the right amount of filament. Adjusting the screws won't fix that unless the filament is only slipping.
Post you settings for your mm/step of axis and extruder and you slicer settings (and which one;slic3r, Kisslicer...). That may help us find what is going on.