Hi guys,
Based on reading your threads, I decided to upgrade from a RAMBo 1.1 board to a Smoothieboard 5X. Would someone please post their firmware and configuration? Did you cut off the RAMBo connectors for the motors and max end stops?
I ordered the ethernet port which needs to be soldered. I also ordered the 5V device but I'm not sure what it does and where it goes.
Jesse
RAMBo to Smoothie Board
Re: RAMBo to Smoothie Board
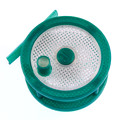
Jesse, here's a photo I put together that should help you.
The 5V regulator goes on the right side where I marked. It allows the board to run on 5V without being connected to the USB port. If you don't use it and want to print detached from the computer you would need to provide 5V at the connector on the right side of the photo.
I configured mine for my mini kossel so I can't be of help there. But, the best thing to do is to grab the most recent edge build - it is pre-compiled for you - from git: https://github.com/Smoothieware/Smoothieware (it's in firmware.bin folder). And DO READ EVERYTHING on the smoothieware.org site - especially the section on 3D printing and search for "delta" to find the special page on delta printers.
Cheers,
Michael
Sublime Layers - my blog on Musings and Experiments in 3D Printing Technology and Art
Start Here:
A Strategy for Successful (and Great) Prints
Strategies for Resolving Print Artifacts
The Eclectic Angler
-
bvandiepenbos

- Printmaster!
- Posts: 923
- Joined: Thu Apr 05, 2012 11:25 pm
- Location: Goshen, IN
- Contact:
Re: RAMBo to Smoothie Board
The schematic shows 5v on the endstop pin, could you power the logic with a jumper from one of the unused endstop pins?
or just above is a row of 5 pins for serial connection, I pulled 5v from the 4th pin from the left to power my GLCD panel, how about using that power source for logic?
I really want to run smoothie standalone like the Rambo.
Seems silly that the board designer did not make a simple jumper like rambo for self powering logic. It already has 5v on board.
~*Brian V.
RostockMAX v2 (Stock)
MAX METAL "ShortyMAX"
MAX METAL Rostock MAX Printer Frame
NEMESIS Air Delta v1 & v2 -Aluminum delta printers
Rostock MAX "KITT" - Tri-Force Frame
GRABER i3 "Slim"
RostockMAX v2 (Stock)
MAX METAL "ShortyMAX"
MAX METAL Rostock MAX Printer Frame
NEMESIS Air Delta v1 & v2 -Aluminum delta printers
Rostock MAX "KITT" - Tri-Force Frame
GRABER i3 "Slim"
Re: RAMBo to Smoothie Board
I run my Smoothie standalone. You need a 5v regulator where it shows on my photograph (on the right). I think the 5V pins you've identified do not have sufficient current to drive the board.
Sublime Layers - my blog on Musings and Experiments in 3D Printing Technology and Art
Start Here:
A Strategy for Successful (and Great) Prints
Strategies for Resolving Print Artifacts
The Eclectic Angler
Re: RAMBo to Smoothie Board
The documentation makes me believe you can either supply external 5v power via the power header, or just run a 12v input and put an on-board regulator for the 5v. If you've already got 5v available via an ATX power supply, I'd just use that and not install the regulator. This way you can keep any heat from a linear regulator, or noise from a switcher, away from the board. Do they even call out regulator requirements to use on there? Doesn't look like much room for a heatsink if you use a linear regulator such as a 7805. They can get pretty warm if you start pushing them. Could use one of EzSBC's switchers which are sized to fit in place of a linear TO-220 regulator.
Quirky board design to be honest. I'm all for versatility, but I would have just picked a single connector size and stuck with it. Would really clean up the appearance, and make the layout easier as well. Would also be nice for room to have heatsinks on the TO-220 MOSFET's as well.
-Hans
Quirky board design to be honest. I'm all for versatility, but I would have just picked a single connector size and stuck with it. Would really clean up the appearance, and make the layout easier as well. Would also be nice for room to have heatsinks on the TO-220 MOSFET's as well.
-Hans
Re: RAMBo to Smoothie Board
Specs are this: switching regulator - they are VERY specific with the components.
Sublime Layers - my blog on Musings and Experiments in 3D Printing Technology and Art
Start Here:
A Strategy for Successful (and Great) Prints
Strategies for Resolving Print Artifacts
The Eclectic Angler