Hi everyone. Just got my printer on Friday and started unpacking all the pieces. Very excited to get this build going and it certainly looks like it will be a project and a half. Already I'm behind because of the much needed RTV. That really would have been nice to be included or at least told to go get while UPS trasported the parts (Plus the thread locker). Just excited to get this going, and the evening was the better time of day (Stores closed).
Very impressed with the packaging and laser cut pieces. This is the modern age after all, isn't it!
Rostock V2 Build - Philly-ish, PA
Rostock V2 Build - Philly-ish, PA
- Attachments
-
-
-
Eaglezsoar

- ULTIMATE 3D JEDI
- Posts: 7159
- Joined: Sun Apr 01, 2012 5:26 pm
Re: Rostock V2 Build - Philly-ish, PA
Looking forward to a new build with lots of pictures.
Looks like you've made some progress. Taking all the paper off the pieces takes a while!
Looks like you've made some progress. Taking all the paper off the pieces takes a while!
“ Do Not Regret Growing Older. It is a Privilege Denied to Many. ”

Re: Rostock V2 Build - Philly-ish, PA
Congrats on the purchase! If you like building, you'll have a blast.
Re: Rostock V2 Build - Philly-ish, PA
End of Day1 pics - I'm only 2.5hrs in to this and the base is somewhat setup. I followed the manual exactly and everything is fitting together nicely.
But I did not have any PTV Caulk. So the hot end is going to be a delay for me on this build. Big disappointment there.
Lots more to do today. Now time to grab some caffeine.
.
Lots more to do today. Now time to grab some caffeine.
.
-
Eaglezsoar
- ULTIMATE 3D JEDI
- Posts: 7159
- Joined: Sun Apr 01, 2012 5:26 pm
Re: Rostock V2 Build - Philly-ish, PA
Your build is doing well so far, looking great!
“ Do Not Regret Growing Older. It is a Privilege Denied to Many. ”
Re: Rostock V2 Build - Philly-ish, PA
Day2 and my back is yelling at me to do something else.  I've got 4hrs in to this today and here are the results. Oh and I found some of the RTV stuff at a local Advanced Auto. Saves the day and keeps this moving forward.
Like how I gave the hotplate logo a nice stash... 
.
.
.
.
-
Eaglezsoar
- ULTIMATE 3D JEDI
- Posts: 7159
- Joined: Sun Apr 01, 2012 5:26 pm
Re: Rostock V2 Build - Philly-ish, PA
You are moving along at a great speed. The stash makes the whole thing look better, in my opinion.
I don't think that Part Daddy will like it though.
I don't think that Part Daddy will like it though.
“ Do Not Regret Growing Older. It is a Privilege Denied to Many. ”
Re: Rostock V2 Build - Philly-ish, PA
Aw man, I just realized the my top plate is backwards. The Z axis is in the correct spot, but the other preps are flip-flopped. Is that a big deal? I noticed this during the tie-down step.
Shoot! I guess I'll have to dismantle it and flip it over.


Shoot! I guess I'll have to dismantle it and flip it over.
-
Kevinvandeusen
- Printmaster!
- Posts: 123
- Joined: Wed Mar 05, 2014 9:53 pm
- Location: Cooley Springs,SC
Re: Rostock V2 Build - Philly-ish, PA
Some have said it does not matter, i did it too, but I. flipped mine, could not sleep!!!!
Distributor of SeeMeCNC in South Carolina
Re: Rostock V2 Build - Philly-ish, PA
Thanks for the response... I decided to forge ahead 'as-is' after realizing the remaining attachments are the spool feeder portion.
Now lets see if it bites me in the arse...
.
Now lets see if it bites me in the arse...
.
Re: Rostock V2 Build - Philly-ish, PA
The build continues with a 3hr second wind. Got the Stop switches wired and everything strapped out of the way of each other AND the belts. Installed the belts and put tension on them. You could feel it skip when it was too loose. Thought that was a problem at first. But now the up/down action is super smooth. My total hours are currently: 10:45hrs. phew.
Also got the EZStuder together and installed. So far not an issue, even though the top should be flipped.
I called it quits due to the Hot End not being fully cured with the RTV paste. This will have to wait till another day..
Thanks to this forumn and all of you who have been through this before (maybe many times). A forum like this is very valuable for every stage or experience level.
Have a good week everyone...
- Attachments
-
-
-
Last edited by gajtguy on Mon Apr 28, 2014 6:22 am, edited 1 time in total.
-
Eaglezsoar
- ULTIMATE 3D JEDI
- Posts: 7159
- Joined: Sun Apr 01, 2012 5:26 pm
Re: Rostock V2 Build - Philly-ish, PA
You also have a good week.
“ Do Not Regret Growing Older. It is a Privilege Denied to Many. ”
Re: Rostock V2 Build - Philly-ish, PA
Couple things I've noticed in your pics... the top wiring I see all the tape you used to hold down wires, the little double oval cutouts on that top plate are for zip ties to hold the wires =)
next, the top plate is actually on correctly, thats how I have them all on the v2s I've built here at the shop...
Third, you have the ez struder in the bracket backwards.. you want the front of the ez struder on the side where the blinky eyes are in the right direction... and in the first pic on your latest update, the ez struder should be on the left set of brackets, so from the front of the machine you can access the ez struder directly... the way to know its right is when the ez struder is mounted to the bracket and the bracket is on the machine, the larger hole on the top plate (that is used to feed the filament down) will be above the red tab on the ez struder.... hope that makes sense..
any questions feel free to ask, I build em all day every day lol
Guanu
Re: Rostock V2 Build - Philly-ish, PA
Guanu - Thanks for taking a look at my build. I always appreciate the feedback. I'm compiling a little list of my own related to the install manual.
On a couple of your points below - Going by the pictures 10-1 & 12-10 within the v1.4 manual would point to a) the top being wrong on my unit, b) the EZStruder being correct (matching the manual). So not sure where the foul up is. I'd love to get some clarity on it though. I see the small hole that "would" be above my ezstruder, if it was flipped to the other side of the mount. But then it wouldn't match the picture in the manual. But that should be easy enough to correct at this stage. Glad I put a quick connect on that 4 conductor cable.
On a couple of your points below - Going by the pictures 10-1 & 12-10 within the v1.4 manual would point to a) the top being wrong on my unit, b) the EZStruder being correct (matching the manual). So not sure where the foul up is. I'd love to get some clarity on it though. I see the small hole that "would" be above my ezstruder, if it was flipped to the other side of the mount. But then it wouldn't match the picture in the manual. But that should be easy enough to correct at this stage. Glad I put a quick connect on that 4 conductor cable.
Re: Rostock V2 Build - Philly-ish, PA
if you look at this pic: https://www.flickr.com/photos/seemecnc/12599727113/ this is how I build them here at the shop, the top plate is mounted just like yours, in this pic, the X tower is the closest one on the right of the pic, and the Z tower is the one on the left in the back... you can see the filament feed hole directly above the ez struder...
The reason I build them like this is the ez struder is accessable from the front of the machine (it is if you do as in the manual too), but this way correctly orients the blinky eyes when you are looking at the machine, so they dont look backwards and dont match the cheapskates.
Guanu
The reason I build them like this is the ez struder is accessable from the front of the machine (it is if you do as in the manual too), but this way correctly orients the blinky eyes when you are looking at the machine, so they dont look backwards and dont match the cheapskates.
Guanu
Re: Rostock V2 Build - Philly-ish, PA
YAY the weekend. Which means printer time! time to complete this sucka..
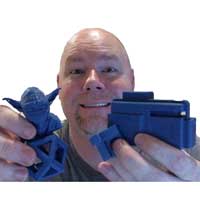
I just found out a good friend just got engaged and I want to print out a gift for her. Maybe a ring that says "taken" on it. Anyone know if a ring is possible to print?
I just found out a good friend just got engaged and I want to print out a gift for her. Maybe a ring that says "taken" on it. Anyone know if a ring is possible to print?
-
Eaglezsoar
- ULTIMATE 3D JEDI
- Posts: 7159
- Joined: Sun Apr 01, 2012 5:26 pm
Re: Rostock V2 Build - Philly-ish, PA
Many rings are available for printing on Thingiverse.com just go there and search for ringgajtguy wrote:YAY the weekend. Which means printer time! time to complete this sucka..
I just found out a good friend just got engaged and I want to print out a gift for her. Maybe a ring that says "taken" on it. Anyone know if a ring is possible to print?
“ Do Not Regret Growing Older. It is a Privilege Denied to Many. ”
Re: Rostock V2 Build - Philly-ish, PA
O-M-G -I am done the building part! Very nice project for those with patience. I total my hours at 15:40 without accounting for multiple runs to the store. But the unit did power up without releasing any blue smoke. Gotta love that.
Here are some pictures of a unit that I almost don't want to actually print anything on. That Hot end was super frustrating. So lets hope it stays intact for a long long while.
Gonna grab some lunch and then it's time to load the firmware and tuning....
Here are some pictures of a unit that I almost don't want to actually print anything on. That Hot end was super frustrating. So lets hope it stays intact for a long long while.
-
Eaglezsoar
- ULTIMATE 3D JEDI
- Posts: 7159
- Joined: Sun Apr 01, 2012 5:26 pm
Re: Rostock V2 Build - Philly-ish, PA
Looking really good! Great job!
“ Do Not Regret Growing Older. It is a Privilege Denied to Many. ”
Re: Rostock V2 Build - Philly-ish, PA
So I'm mostly through the calibration phase. All looking good so far. Only 1 hiccup though, on the Bed Temp PID Autotune. The first pass came up with a "failed: timeout" error. The temp was rising, but I guess it took too long. So I took the glass off, then unscrewed it from the base to check the wiring & solder joints. All looked good to me.
So I re-ran the test without screwing it down again, and this time it passed!! I got the average values of: Kp=75.943, Ki=1.496, Kd: 988.33. I plugged those in to the eeprom screen.
Then I re-attached the bed properly and re-ran the test (without the glass). I got these values: Kp=62.043, Ki=1.103, Kd=874.173.
Hmm. Okay. Lets see what happens when I put the glass back on and re-run: I get: Kp=80.736, Ki=1.476, Kd=1103.056
So which values should I use? I figured the last test was the most accurate for having the glass on, and for normal use. So I plugged them in. But why are the values not even close? Or is this a minor thing and I should ignore and move on...
Keep in mind, I am just a monkey following instructions. So I have NO idea what the implications are good or bad.
Thanks
Re: Rostock V2 Build - Philly-ish, PA
Holy crap, I've got my first print job underway!!
The Onyx Bed Ver3 was a power hog. So I change the power feed to another supply (600w I had already). I doubled up on 16awg wires as the feed in to the Rambo controller AND doubled up the same as the feed to the Onyx Bed. The supplied single 18awg was simply not doing the trick. After all that rewiring, I re-calibrated the Bed and tried to go to 90c using the Fan Shroud object. It's now working - jumping up and down.
For record sake - the Onyx Ver3 bed measured 1.4ohm
I do want to try the 24v method, once I get a lot more comfortable with the various posts on this same topic. Seems this has been an issue for others...
PS- My weekend goal is now complete! ahhhhhh
The Onyx Bed Ver3 was a power hog. So I change the power feed to another supply (600w I had already). I doubled up on 16awg wires as the feed in to the Rambo controller AND doubled up the same as the feed to the Onyx Bed. The supplied single 18awg was simply not doing the trick. After all that rewiring, I re-calibrated the Bed and tried to go to 90c using the Fan Shroud object. It's now working - jumping up and down.
For record sake - the Onyx Ver3 bed measured 1.4ohm
I do want to try the 24v method, once I get a lot more comfortable with the various posts on this same topic. Seems this has been an issue for others...
-
Eaglezsoar
- ULTIMATE 3D JEDI
- Posts: 7159
- Joined: Sun Apr 01, 2012 5:26 pm
Re: Rostock V2 Build - Philly-ish, PA
Looks good, the larger wires did the trick. Happy Printing!
“ Do Not Regret Growing Older. It is a Privilege Denied to Many. ”
Re: Rostock V2 Build - Philly-ish, PA
Couple issues on this first print. Any suggestions on the cause or how to fix? I'm sure there is some parameter hidden somewhere that would help.
But for this shroud, these issue are not a deal breaker. I'm gonna clean it up and put it in..
But for this shroud, these issue are not a deal breaker. I'm gonna clean it up and put it in..
- Attachments
-
-
-
Polygonhell
- ULTIMATE 3D JEDI
- Posts: 2417
- Joined: Mon Mar 26, 2012 1:44 pm
- Location: Redmond WA
Re: Rostock V2 Build - Philly-ish, PA
if the loops are just on the overhang, additional cooling would help, though with ABS it can cause its own issues, I'd drop the temperature slightly, possible reduce the layer height a bit, that overhang should be printable.
Printer blog http://3dprinterhell.blogspot.com/
Re: Rostock V2 Build - Philly-ish, PA
I just rec'd a V2 Onyx bed from the support team. Wired it up last night and put it through a test today. Boy what a dramatic difference. This new bed got to 90degrees in 9minutes. The Rev3 bed took just over 30min.
Now I did still use the separate 12v power supply. I can now consider getting back to the single power supply supplied with the unit.
Plus I did still use the pan lid trick to let the heat build up. But that is what I was doing with the Rev3 bed and it still took really long..
Oh and I did wire the Rev2 bed with doubled up 18awg wire, instead of the doubled up 16awg that I had on the Rev3 board.
Looks like I'm sitting pretty now...